Wednesday, June 12, 2013

NEEWER LED Macro Ring Light 48 X LED with 6 Adapter Rings for For Canon/Sony/Nikon/Sigma Lenses

NEEWER LED Macro Ring Light is not as good as I hoped, but good enough to be useful in some situations. I am including a collage of 6 photos to illustrate my review.


The ring light came with 6 adapters (49mm/52mm/55mm/58mm/62mm/67mm), which fit both of the cameras I use. The adapters work similar to Cokin filters where you attach a metal ring of the adapter to the lens of the camera, and then slide the light ring into the adapter.


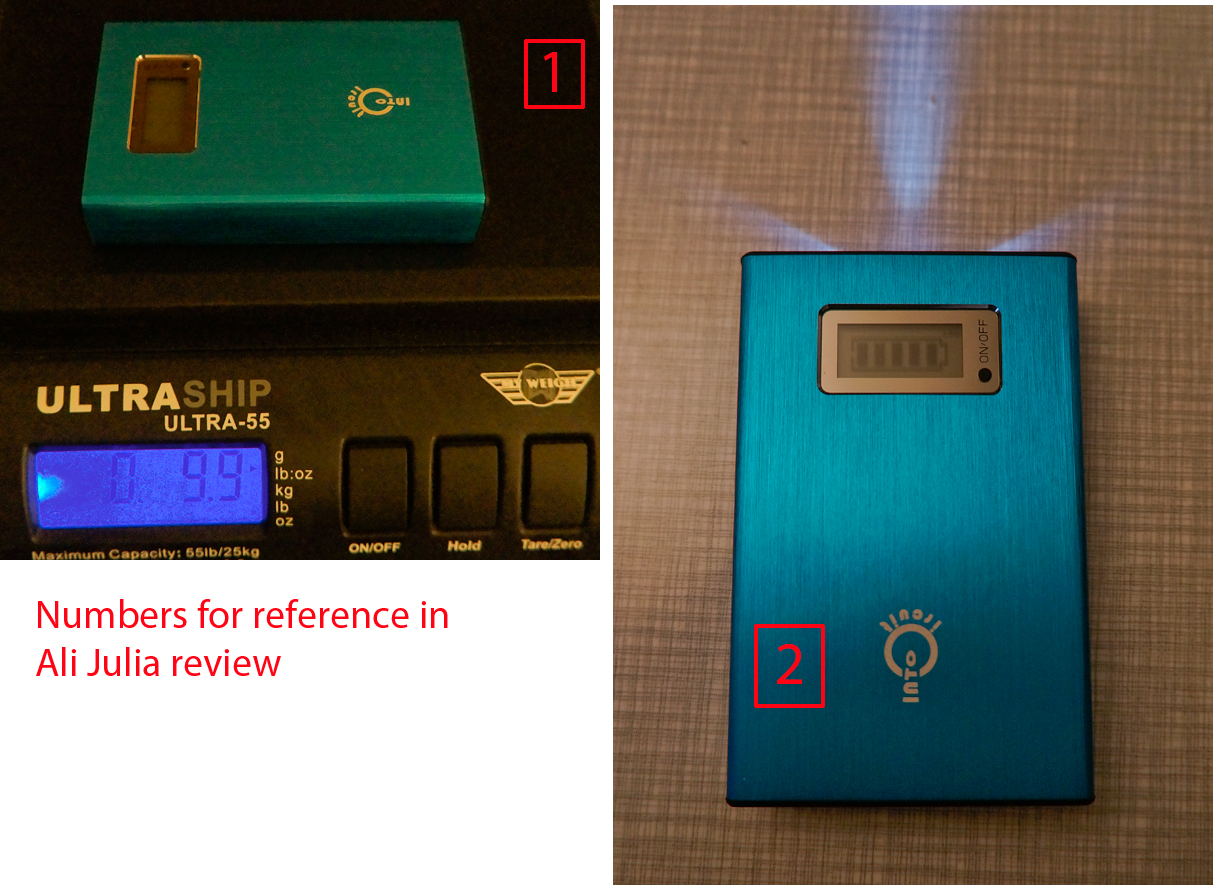
I selected this particular light ring because it could run on DC power as well a battery pack. The power pack is mounted in the hot shoe but the mount is used purely to hold the batteries in place on the camera. The ring does not communicate with the camera, once you turn on the light it is permanently turned on. The power unit is 3.75" tall and 1.5" x 1.5". It weight 4.2 oz with the batteries installed, and 8.7 oz together with the right light itself.


I hoped I would be able to hook up DC power to the ring without going through the hot shoe mounted battery back because my SONY NEX5 does not have a standard hot shoe mount. However, even without the batteries you need to use the power unit. Luckily the power unit has a 17" power cord so for the table top photography I can leave the power adapter laying on the table, and when shooting outdoors I can stick it into a pocket (I just need to remember to wear a shirt or vest with a pocket at the chest level). I like this approach better than using the cumbersome hot shoe adapter for SONY cameras.


As I mentioned earlier the unit provides continuous lighting (not flashing). There are a total of 48 LED lights and three settings: all lights on, left half of the ring is on, and the right side of the ring is on.


To demonstrate how the light ring works I am using a 17 inch power strip (this is a boring subject for sure but the length of the strip shows the light distribution very well).


There are two sets of photos, four are taken with the light 2 feet away from the object. Another two are taken with the light 6 inches away from the object. The photos are not edited in any way, just shrunk and stitched together. I took all pictures with a wide angle lens (18mm) so you can see the light ring in the shot - this makes it easier to see which lights of the ring were turned on, and also shows what you get if you use a wide angle lens. The photos were taken with the ring light being the only light source.


Photo #1 shows show the strip at 2 feet with the full ring of lights.

Photo #2 same lighting and distance but above the power strip rather than to the side.

Photo #3 shows strip at 2 feet with half the lights on, on the right side of the ring.

Photo #4 shows strip at 2 feet with half the lights on, on the left side of the ring.

Photo #5 shows the strip from 6 inches from above

Photo #6 shows the strip from 6 inches from the side


For photos take from 6 inches the ring produced pretty good results, however photos with the subject 2 feet away were not good. I hoped to be able to use the ring light at 2 feet, but the it did not produce sufficient amount of light for use at that distance. It does reduce shadows at the 2 feet distance when used in combination with another light source.


The bottom line, I found good uses for this ring light, but it did not totally live up to my high hopes.


You can find it on Amazon by following this link.


AshopZones review ★★★★☆


Monday, June 10, 2013

Transcend 8 GB microSDHC Class 6 Flash Memory Card

Transcend 8GB card and the sleeve worked well. I used the card for a video camera and it worked well. The card in the sleeve was recognized in my PC without problems.


To test the speed of the card I tested Transcend 8 GB microSDHC Class 6 Flash Memory Card by copying a large set of mp3 files totalling 638916 Megabytes. I measured CPU time and clock time. For comparison I including numbers for copying the same set of files from and to hard disk of my computer, and to USB2 memory stick.


I ran each test twice, and the numbers you see is the average of the two tests.


✔ Transcent microSDHC : 1.482s (CPU time), 1:33.97 (clock time)


✔ USB2: 1.358s (CPU time), 1:23.53 (clock time)


✔ Hard Drive: 0.573s (CPU time), 0:00.58 (clock time)


Good price, card works well, I would buy it again.


You can find it on Amazon by following this link.


AshopZones review ★★★★★


Saturday, June 8, 2013

Book review: How to Design and Make Bracelets with String, by Isabella Forrer

I found this guide very helpful and easy to follow.


The first part of the guide shows step by step examples of how to make string bracelets by tying various knots (half knot, half hitch, square knot, open square knot, butterfly knot, switch knot, alternate double half hitch). The extras section provided several methods for adding beads to the bracelets. The second part of the guide covers necklaces, braided jewelry, and on-line resources for string and beads.


The guide's instructions are clear, each step includes an illustrated drawing which shows exactly how to place the strings. The author included many nice photos of the completed bracelet so you have an idea of what you will get at the end. Anyone can make bracelets, however it will take some practice to make them as nice as even as the author's bracelets!


I was looking for a project that would be fun to do with a group of youngsters (boys and girls) and making string bracelets was a big hit! Everyone enjoyed tying knots and exchanging bracelets at the end. I could not have done it without this little guide!


You can find it on Amazon by following this link.


AshopZones review ★★★★★


Thursday, June 6, 2013

Polaroid XS100 Extreme Edition HD 1080p 16MP Waterproof Sports Action Video Camera

This 6 oz video camera is fun to use and produced pretty good video. I am attaching a video taken with the camera and 6 photos of the camera itself to illustrate my review.


I took Polaroid XS100 camera with me on a weekend trip and recorded video snippets through the entire day. I made about 2 hours of recording (on a single charge battery charge). The attached video contains four clips took during this trip in various lighting conditions.


✔ Driving in the car

Note when the sun hits the camera you can see a bit of a halo from the dome that covers the lens. The anti-vibration feature of the camera is very effective in the car.


✔ In bright day light

Excellent color and sharpness especially when the sun is behind


✔ Inside a store

Worked well in a small quarters and fairly dim lighting


✔ At night

Very good low-light performance. The anti-vibration feature of the camera is not effective for larger scale shakes which is the results of the bobbing camera during a walk.


The camera has 170 degree wide angle lens. I used Class 6 MicroSD card. F2.8 Fixed Focus Lens focused well and performed well in low light. My video was shot as 960p.


Video options are:

1080p: 1920x1080p / 30FPS / 16:9

960p: 1280X960P / 30FPS / 4:3

720p:1280x720 / 60FPS (Slow Motion) / 16:9

720p: 1280x720 / 30FPS/ 16:9


Photo options are:

Resolutions 16MP, 5MP, 3MP, VGA

Photo Mode: Single / Burst (x10) / Time Lapse (5,10,30,60)


The camera records two formats of files at once - full size and low-resolution "thumbnail" video, which is useful for sharing.

My full size video was generated in .mov format. I converted it to .mp4 for editing with my Linux-based video editing tools.


The first photo shows everything that comes in the package: the camera, the pouch, HDMI cable, and a large number of mounts and sticky pads.


The camera is water tight up to 30 feet. The lens is covered with a dome (see photo #5), the back has a water tight lock (see photo #4). Photo #3 shows the back of the camera with the cover off. The top slot is for micro sd card, below is HDMI port, below it the charging port, to the left the selection for video format, on the right the reset hole.


Note: I had trouble turning on the camera for the first time after charging, but pushing the reset button fixed the problem and the camera turned on.


The video camera is operated by two buttons on the top of the camera (see photo 4). The long button with dots control video recording. And the smaller button in front is used to turn on the video camera on and off (with a slight hold) or take still pictures (with a light press without any hold).


Photo #6 shows the bottom of the camera where various mounts attach. The mounting screw is plastic and one has to be careful not to strip it with a metal mount.


Photo#2 shows the camera on 1 inch gridded mat for size reference. The camera weights 6 oz. It is 4 inches long, and the lens portion is 1 3/8 inches in diameter. The pouch has a Velcro closing, and it is possible to put the camera into the pouch even when it is attached to a mount.


Other starting and setting, the only setting you can change directly from the camera is the format (HD or FHD). To change other settings you need to connect the camera to the PC (Mac or Windows) and use the Polaroid software. For example, if you wanted to set the camera to take pictures on a certain interval. This requires you to pre-plan what you will do on each trip unless you can take a laptop with you. I wish I could control more things directly from the camera, but that would probably have made the camera larger.


If you have Windows-based PC Polaroid.exe is automatically installed from the camera into the micro sd card when you connect PC for the computer for the first time. If ou have a Mac you need to down load the software by from the web site (note that web site name is polaroidaction-dot-com (not polaroid-dot-com). Because my primary operating system is Linux the software did not get installed automatically and I needed to download Windows executable from the web site. The file name you download from the website is called setting_win.exe (not polaroid.exe as the file that is automatically installed).


The camera comes with HDMI cable that allows you to view and manage the content of your MicroSD card on your TV. However, I found that for me it easier to remove the MicroSD card and place manage it from the computer.


Polaroid camera comes with gravity sensor G-Sensor, which auto rotates the image even if you mount to the camera upside down. It is not totally fool proof as one of my video was recorded side ways. I must have rotated it after I turn the camera on but did not realize it. But the rest of around 30 videos were perfectly oriented.


Audio recording worked, but recorded audio sounds fairly low compared to my other video camera.


I was provided a sample for a review be it positive or negative, and I tried to cover both the positives and negatives of my experience.


Overall, I thought it was a fun camera to use and I thought it produced pretty good results.


You can find it on Amazon by following this link.


AshopZones review ★★★★★


Tuesday, June 4, 2013

Intocircuit Power Castle Series PC11200 11200mAh Heavy Duty 5V 2A/1A Dual USB Ports External Battery Pack Charger

I tested Intocircuit Power Castle Series PC11200 11200mAh Heavy Duty 5V 2A/1A Dual USB Ports External Battery Pack with Nexus 7 Tablet (JellyBean 4.2.2), Samsung Galaxy 7.7 Tablet (ICS 4.0.4), and Samsung Galaxy Nexus cell phone (JellyBean 4.2.2).


I own several external battery packs. To test their performance I run the same set on tests on each of them in order to provide unbiased results as the numbers speak for the performance of each unit.


To test Intocircuit power pack I ran my 10 minute test for each of my 3 devices on each of the 2 ports for a total of 6 tests. In addition I charged both Nexus phone and Nexus Tablet at the same time, one in each port. The results of these 7 tests are included in the tables below.


I am attaching a collage of 2 photos.


Photo #1 shows the power brick on the digital scale, its weight is 9.9 oz. The size of the power pack is 2.625" by 4.375" by 0.875".


Photo #2 shows the top of the unit which has an LED screen showing the level of charge. Next to the screen there is a small lack button which turns on the LED light. The light is pretty dim. Some other power bricks I have have a much brighter light, however this is not a key feature of the battery pack and the underpowered light did not effect my rating of this unit.


This power pack has two outlets, they are not labelled.


I use Battery App by Elvison to determine how each device recognized the charging source. 'AC' status means the charging is at full charging rate. 'USB' status indicates charging at a lower charging rate. 'Discharging' status means that the charging rate is below the power that the device is consuming so it slows down the discharge rate but does not re-charge.


My methodology is to charge each mobile device on each port of the unit for 10 minutes and measuring how much each unit was charge in that 10 minute period. Each line in the table below represents a separate 10 minute test.


The key findings:

(1) Both Nexus phone and Nexus 7 tablet (both running Jelly Bean 4.21) charged at AC rate on both ports.

(2) Samsung Galaxy 7.7 works, but shows different behaviors on the two ports


The table below summarizes my findings:


Nexus 7 Tablet

--------------

right port.......AC rate.....1% charge increase

left port........AC rate.....2% charge increase


Samsung Galaxy Nexus Phone

--------------------------

right port.......AC rate.....5% charge increase (among the best rates in my tests)

left port........AC rate.....5% charge increase (among the best rates in my tests)


Nexus 7 Tablet and Samsung Galaxy Nexus Phone at the same time

--------------------------------------------------------------

Tablet...........AC rate.....1% charge increase

Phone............AC rate.....5% charge increase (among the best rates in my tests)


Samsung Galaxy Tablet 7.7

--------------------------

right port.......AC rate..... 1% charge increase

left port........AC rate..... discharging if screen is on, 1% charge increase if screen is off


In addition to the tests above we used Nexus 7 Tablet to navigate during a several hour trip while plugged into Intocircuit Power Castle Series PC11200 11200mAh external battery (rather than the car charger). Nexus 7 remained charged at 100% at the end of the trip.


I received this battery pack from the manufacture for an honest review be it positive or negative. Running the same set of test on all my external batteries allows me to provide an unbiased review. By comparing the results of the tests for this battery to the other external batteries I tested, this power pack earned a 5 star rating.


You can find it on Amazon by following this link.


AshopZones review ★★★★★


Sunday, June 2, 2013

Bolse® 3.1 Amp Dual USB Port High Output Car Charger 15w

I tested Bolse 3.1 Amp Dual USB Car Charger with Nexus 7 Tablet (JellyBean 4.2.2), Samsung Galaxy 7.7 Tablet (ICS 4.0.4), and Samsung Galaxy Nexus cell phone (JellyBean 4.2.2).


I own several car chargers and ran the same set on tests on each of them to provide unbiased results as the numbers speak for the performance of the unit.


To test Bolse car charger I ran my 10 minute test for each of my 3 devices on each of the 2 ports for a total of 6 tests. I repeated the same tests with a data cable and with a charging cable. The results of these 12 tests are included in the tables below.


I am attaching a collage of 4 photos labeled with numbers 1 through 4 under customer photos that I will be referencing in this review. You can locate this photo by following 'customer photos' link under the main photo.


Photo #1 shows the charger on a gridded mat next a pen for size reference. The car charger is 3.5" long. The charger's face is 1.25" by 1".


Photo #2 and #3 show how the charger fits into our two cars. It has a relatively log neck and fits very well in both car configurations. It goes in firmly, forms a good contact, and stays plugged in well even over rough roads. The charger has two outlets labelled 1.0 AMP and 2.1 AMP.


Photo #3 shows one of the tables during the testing. I use Battery App by Elvison to determine how each device recognized the charging source. 'AC' status means the charging is at full charging rate. 'USB' status indicates charging at a lower charging rate. 'Discharging' status means that the charging rate is below the power that the device is consuming so it slows down the discharge rate but does not re-charge.


My methodology is to charge each mobile device on each port of the unit for 10 minutes and measuring how much each unit was charge in that 10 minute period. Each line in the table below represents a separate 10 minute test


The key findings:

(1) Samsung Galaxy 7.7 cannot be charged with this car charger with either port

(2) Both Nexus phone and Nexus 7 tablet running Jelly Bean 4.21 charged at AC rate on both ports.


The table below summarizes my findings:


Nexus 7 Tablet

--------------

1 AMP port.......AC rate.....1% charge increase (data cable)

2.1 AMP port.....AC rate.....1% charge increase (data cable)


1 AMP port.......AC rate.....1% charge increase (charging cable)

2.1 AMP port.....AC rate.....2% charge increase (charging cable)


Samsung Galaxy Nexus Phone

--------------------------

1 AMP port.......AC rate.....2% charge increase (data cable)

2.1 AMP port.....AC rate.....3% charge increase (data cable)


1 AMP port.......AC rate.....4% charge increase (charging cable)

2.1 AMP port.....AC rate.....3% charge increase (charging cable)


Samsung Galaxy Tablet 7.7

--------------------------

1 AMP port.......AC rate.....discharging (data cable)

2.1 AMP port.....AC rate.....discharging (data cable)


1 AMP port.......AC rate.....discharging (charging cable)

2.1 AMP port.....AC rate.....discharging (charging cable)


I received this car charger from the manufacture for an honest review be it positive or negative. Running the same set of test on all the chargers I own allows me to provide an unbiased review. By comparing the results of the tests for chis charger to the other car chargers I tested, this car charger earned a 5 star rating. The only thing this charger did not do well is handle my Samsung tablet. However neither did other generic car chargers, Samsung tablet only works well with the car charger made by Samsung.


You can find it on Amazon by following this link.


AshopZones review ★★★★★


Saturday, June 1, 2013

Ideative SS1630A-03 Socket Sense 6-Outlet Expandable 1080 Joules Surge Protector

Before I purchased Ideative power strip I had three power strips sitting next to each other charging various batteries and gadgets, it was a mess! The reason I had so many strips is that many of my chargers take up more than one slot, so it took a lot of strips to house them all. I am attaching a photo collage of 2 photos that will illustrate how I use this strip to hold 2 AA battery chargers, one AAA charger, one camera charger, hand held vacuum charger and a two slot USB charger. The photo can be located by following 'customer photos' link under the main photo.


The first photo shows the empty strip: it has 6 outlets. The strip has 5 movable segments, which can be adjusted to fit your various devices. The 5 segments with outlets are 1.5" wide each and the width of the moving segment can be changed from 0" to 1.25". The plugs holes are oriented on an angle. Ideally another 0.25" of the inch between the segments would have made it possible to fit all my charges next to each other in any order, as it stands now finding the optimal configuration is a bit like putting a jigsaw puzzle together. This is a thick power strip, the raised part of the strip near the cord is 2.25" from the surface. The power cord on this charger is a fairly short, it is 34 inches.


The second photo shows how I plugged in my chargers. Luckily some of my chargers are not polarized, so I could orient them in different ways making the long USB charger hang over the edge where there was room.


Overall, I am very pleased with this strip. It is a space saver!


You can find this 3 foot cord on Amazon by following this link


You can find it on Amazon by following this link.


AshopZones review